Vivaldi Tips
A huge collection of Vivaldi browser tips, tricks and hacks.
Tip #668
March 11, 2025
Make updating events in the Vivaldi Calendar a delight by enabling the correct settings.
Which is more important to you – event length or that it ends at the set time even when the start time changes? Whatever your preference, Vivaldi Calendar comes with a setting to cater to both needs.
To review the setting:
- Go to Settings > Calendar > Calendar Settings > Calendar Editing > Auto Adjust End Time.
- Choose between:
- Always, i.e. push the end time forward,
- Never, i.e. keep the same end time,
- Adjust the end time, except for all-day events.
Tip #667
March 10, 2025
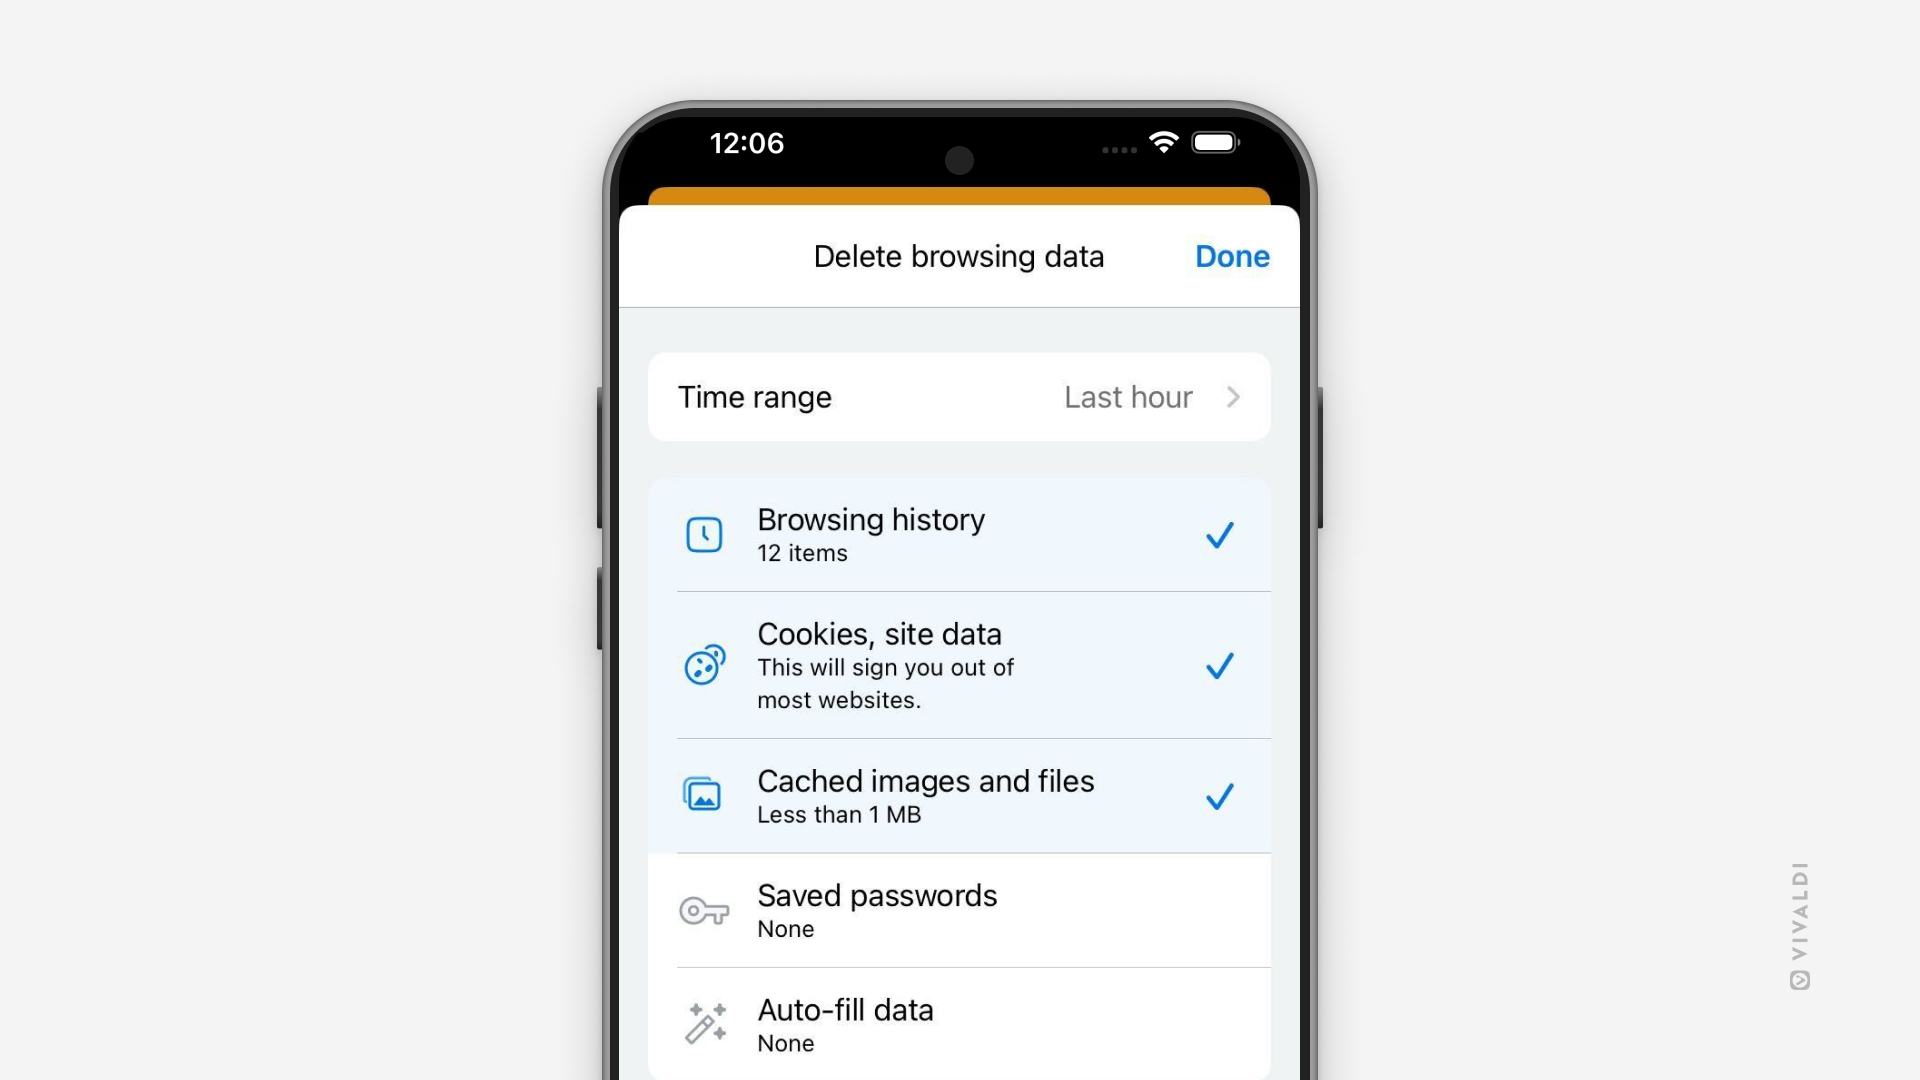
Start fresh by deleting History and other browsing data in Vivaldi on iOS.
It can be convenient to find a page you recently visited or autofill forms with your information, but it’s also good to get rid of unnecessary data every now and then. In Vivaldi on iOS, you can choose what to delete and for what time period.
To delete your browsing data:
- Open the Vivaldi menu > Delete browsing data.
Alternatively, tap on “Delete browsing data” in the History Panel or go to Settings > Privacy and security > Delete browsing data. - Select the time range you want to delete data for.
- Select the data types you want to delete.
- Tap on “Delete browsing data”.
Tip #666
March 7, 2025
Reorder tiled tabs for a more comfortable view.
In Vivaldi there’s no need to jump back and forth between tabs – Tab Tiling allows you to view several tabs at the same time in a split-screen view. Depending on your tab order and the layout of the web pages, the grid view might not work out of the box, so it’s necessary to adjust the view by resizing the tiles (see Tip #47) and by reordering the tabs in the tiled view.
To reorder tiled tabs:
- Click on a tab you want to move and hold down the mouse button.
- Drag the tab to a different location on the Tab Bar.
- Repeat with the other tiled tabs until all tiled tabs are where you want them.
Tip #665
March 6, 2025
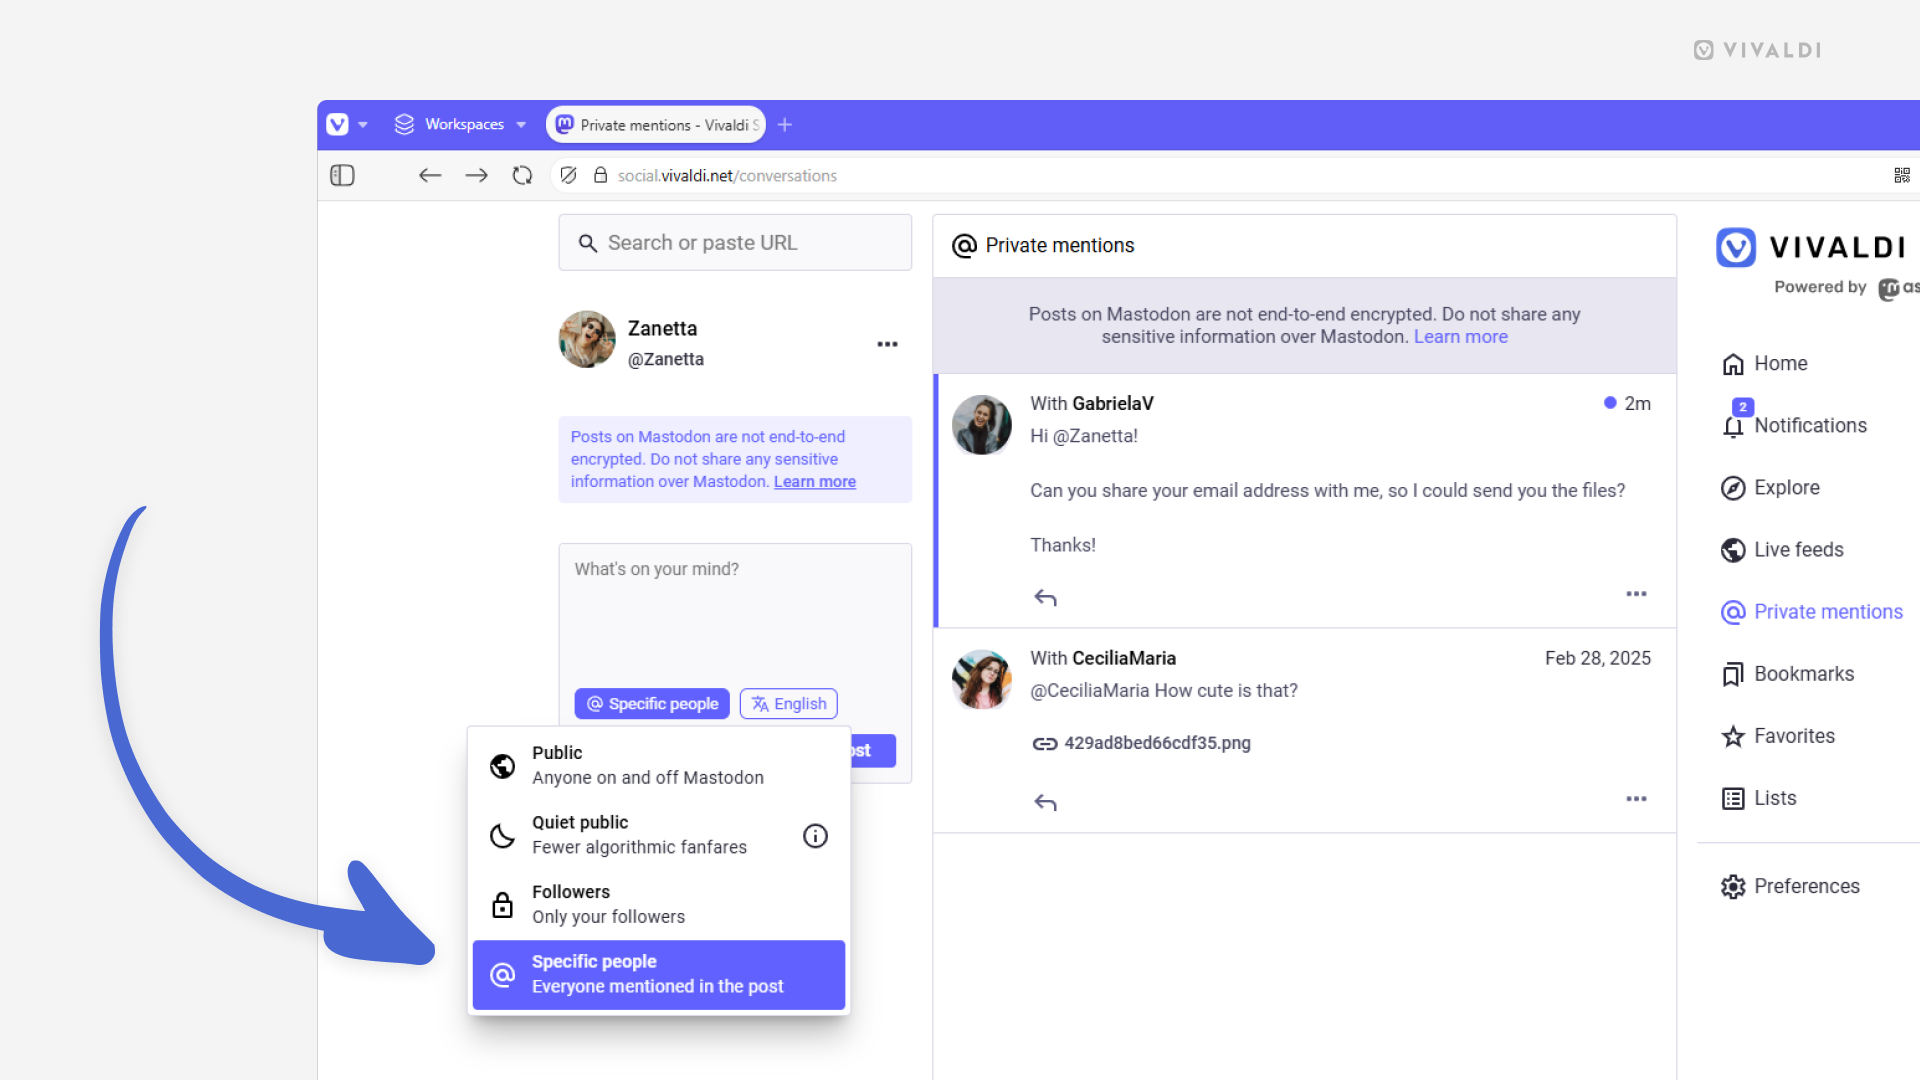
Keep conversations private on Vivaldi Social.
In addition to public posts, you can send direct messages on Vivaldi Social, which will be visible only to those who you mention/tag in the message. If you want to allude to someone, but don’t want them to see the message, exclude the @ symbol from in front of their user handle.
All private conversations can be viewed and managed on the “Private mentions” page.
To send a private message:
- Compose your message.
- In the message, mention everyone who should see it.
- From the message options menu, for visibility select “Specific people”.
- Click “Post” to send the message.
Please note that private messages on Mastodon are not end-to-end encrypted, so be cautious of the information you share.
Tip #664
March 5, 2025
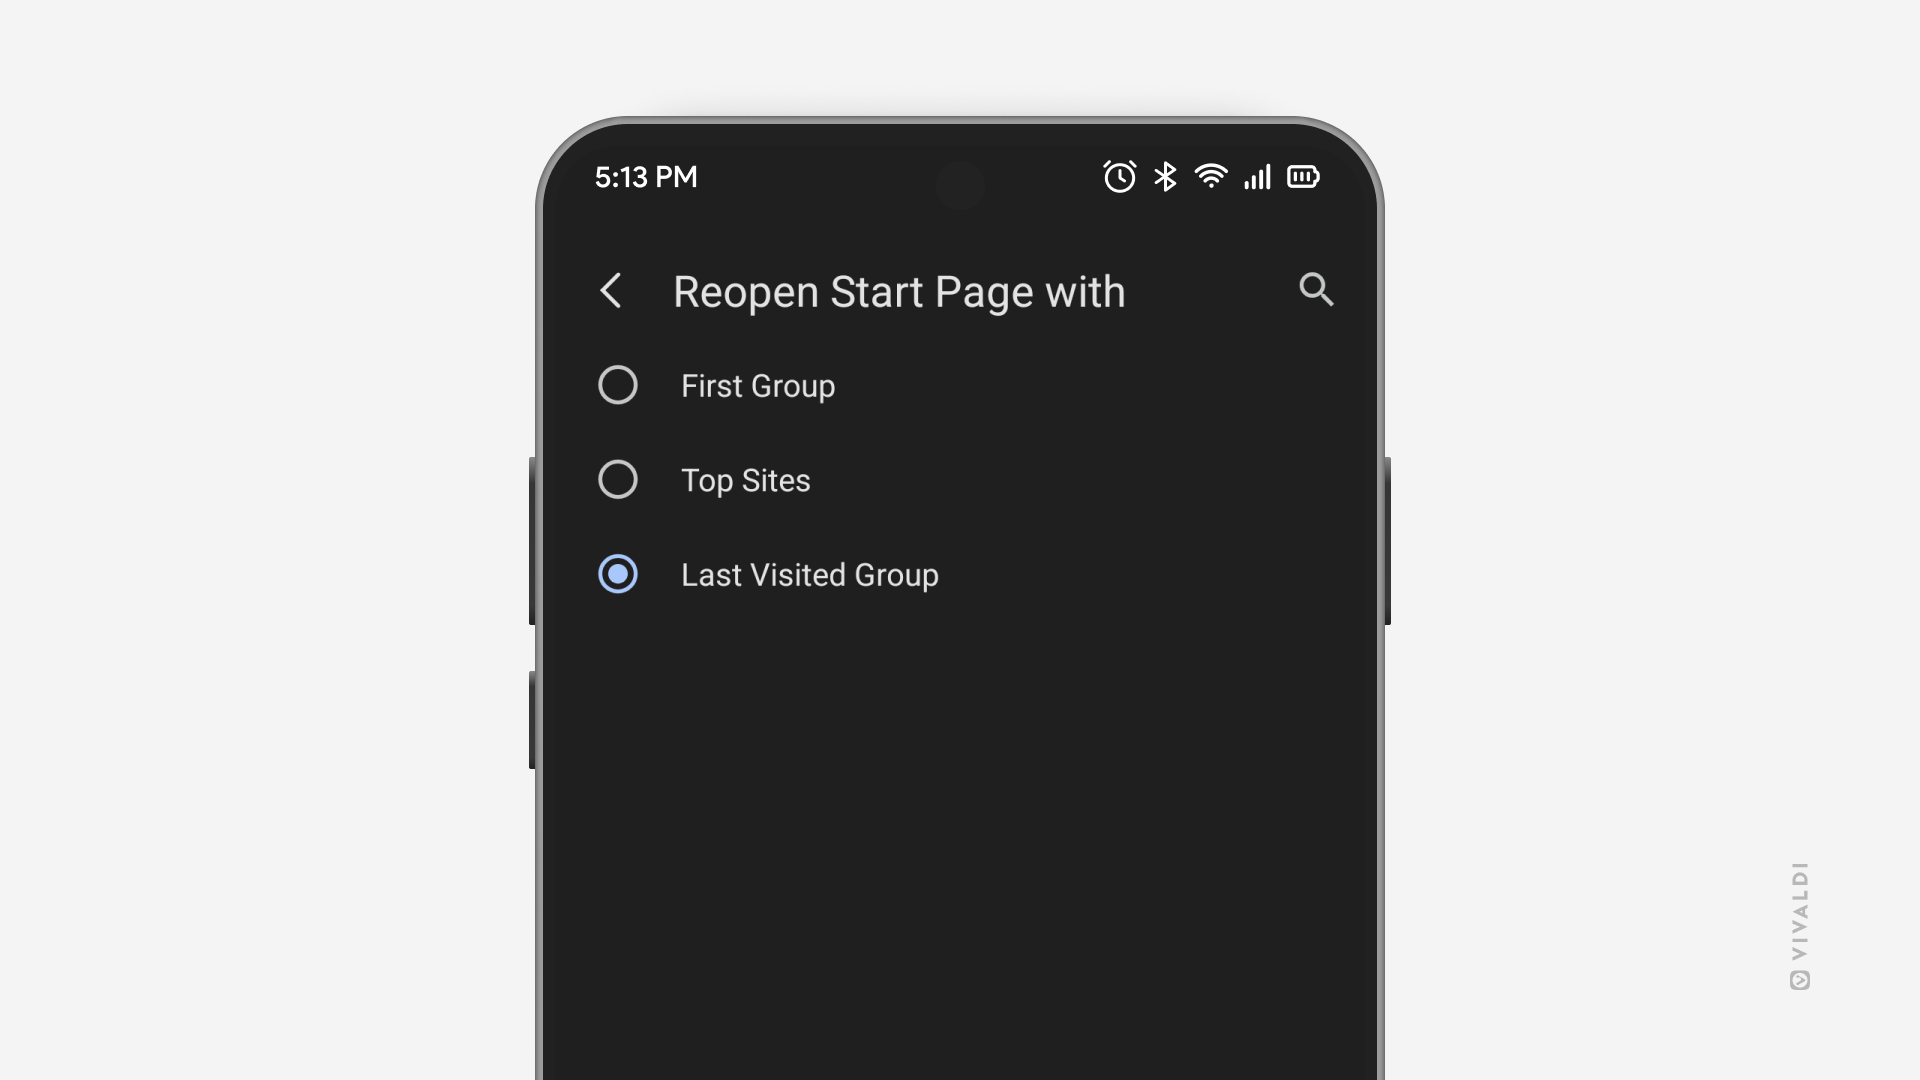
Choose which Speed Dial Group to display when going to the Start Page on mobile.
We all have our preferred workflows and it’s great when the tools you use are able to adapt to that workflow. That’s why in Vivaldi on Android and iOS you can choose what gets shown to you when you open the Start Page. Is it the selection of your most visited sites (bookmarked or not), the first group with your most important Speed Dials, or the one you viewed most recently?
To select your preferred Start Page opening view:
- Go to Settings > Start Page > Reopen Start Page with.
- Choose between:
- First Group,
- Top Sites,
- Last Visited Group.
Tip #663
March 4, 2025
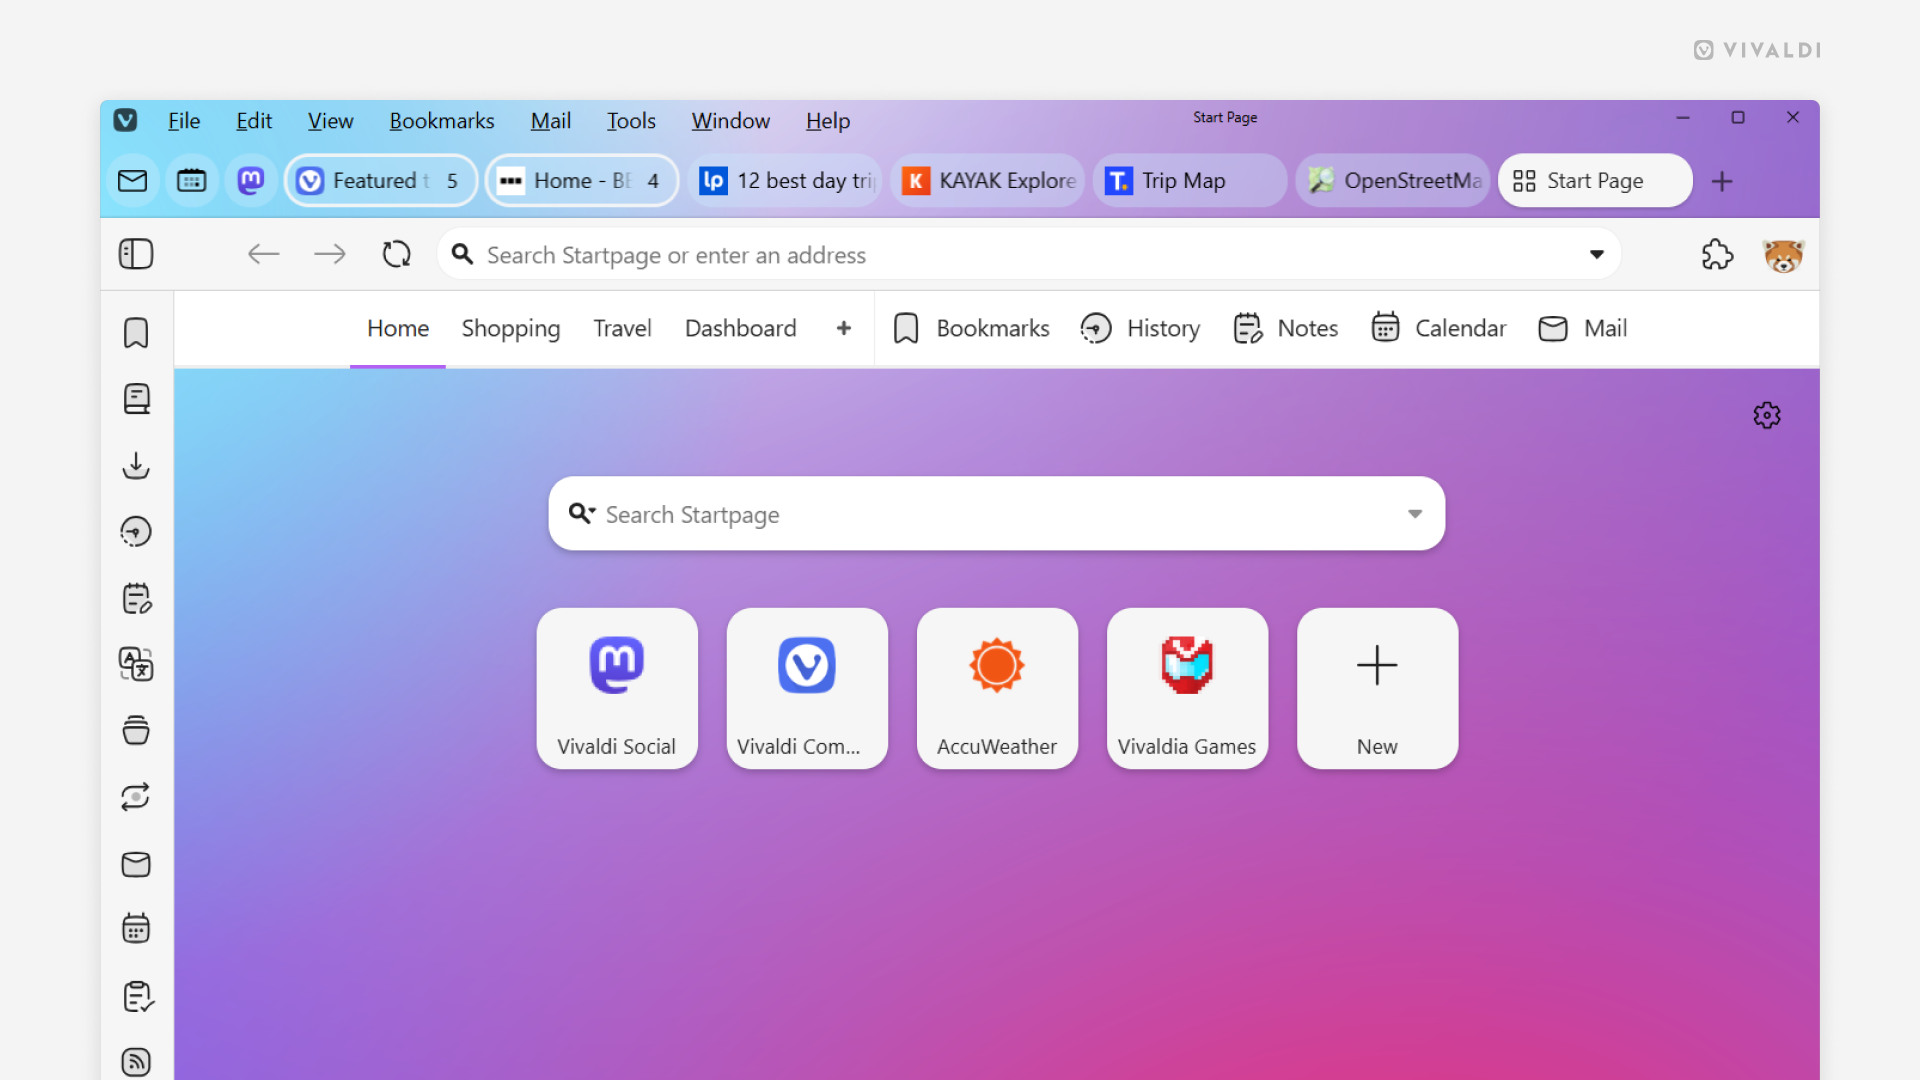
Keep the Tab Bar only for tabs by moving or hiding the other buttons.
In Vivaldi, you can customize aspects you might have not even known could be customized, for example, on the Tab Bar.
To hide the Synced and Closed Tabs buttons:
- Go to Settings > Tabs > Tab Display > Tab Bar.
- Disable “Display Trash Can” and/or “Display Synced Tabs Button”.
Please note that to open tabs sent from other synced devices using the “Send to Device” feature you need to have the Synced Tabs button enabled.
To hide the Workspaces menu:
- Go to Settings > Tabs > Workspaces.
- Disable “Show Workspaces in the Tab Bar”.
When the Tab Bar buttons have been hidden, you can access your Workspaces, and Synced and Closed Tabs from the Windows Panel.
To move the menu and window control buttons (minimize, maximize, close):
- Go to Settings > Appearance > Menu > Menu Position.
- Select “Horizontal”.
This will move the menu and window control buttons to their own toolbar.
Tip #662
March 3, 2025
Create a Command Chain to copy the active tab’s link with a single shortcut.
If you’re a fan of using Vivaldi with your keyboard, you’re probably familiar with Ctrl/⌘ + L and Ctrl/⌘ + C shortcuts for copying the link of the web page you have open in the active tab. By using Command Chains, you can merge them into a single shortcut.
To create a chain for copying page links:
- Go to Settings > Quick Commands > Command Chains.
- Add a new chain with the following commands.
- Focus Address Field
- Delay (1000)
- Copy
- Go to Settings > Keyboard > Chains.
- Find your new chain and give it a new keyboard shortcut.
In addition, you can create a Mouse Gesture for the command, trigger it via Quick Commands, and add a button to the browser’s toolbars.
Tip #661
February 28, 2025
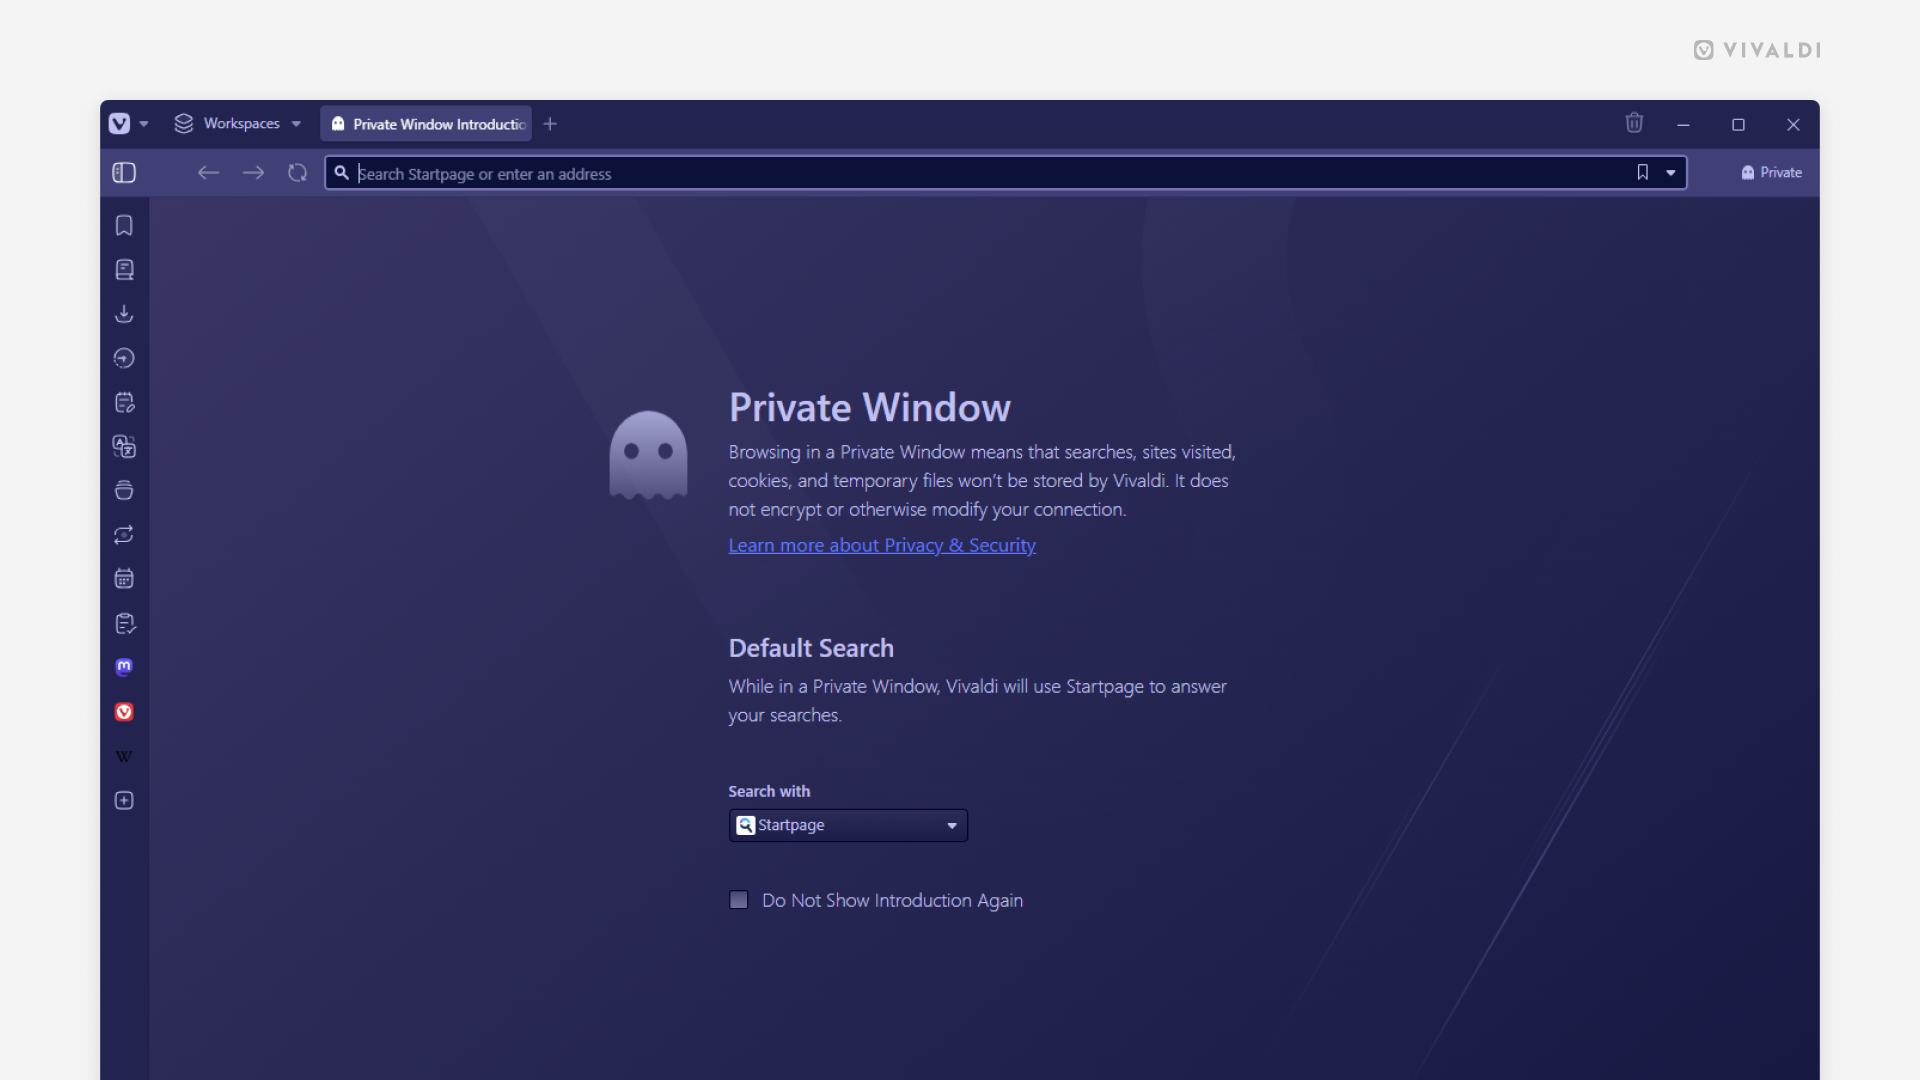
Get straight to your Start Page by disabling the Private Window Introduction.
When it’s your first time using a Private Window in Vivaldi, it’s good to be educated about what it actually entails. In Vivaldi, browsing in a Private Window means that searches, sites visited, cookies, and temporary files won’t be stored by Vivaldi. It does not encrypt or otherwise modify your connection.
That’s why you’ll see an introduction whenever you open a new Private Window. If you regularly browse in Private Windows, this information is already known to you. That’s why you can hide it and display your preferred New Tab Page, such as Speed Dials or the Dashboard instead.
To hide the introduction:
Option 1
- Open a new Private Window.
- Tick the box “Do Not Show Introduction Again”.
Option 2
- Go to Settings > Privacy and Security > Private Windows.
- Disable “Show Introduction”.
Tip #660
February 27, 2025
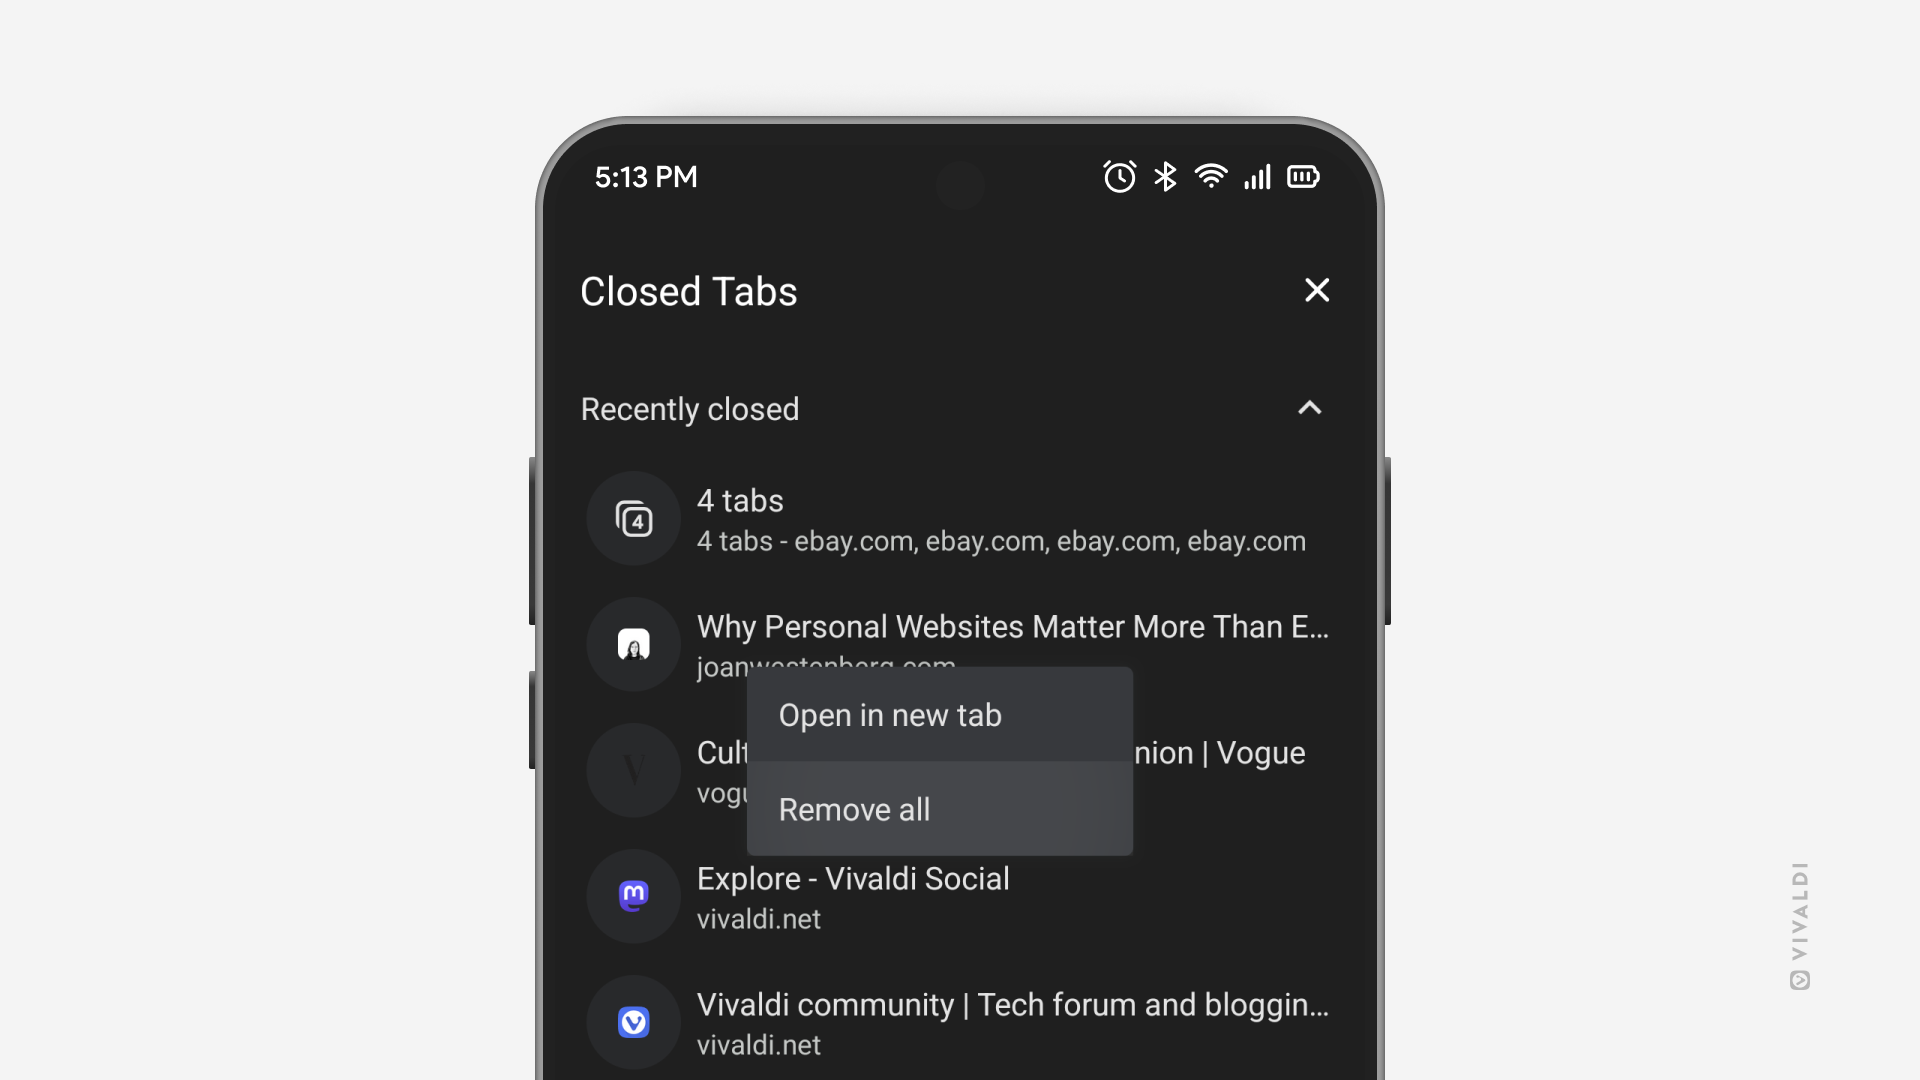
Clear the list of recently closed tabs in Vivaldi on Android’s Tab Switcher.
In case you don’t want to delete your full browsing history on Android, but still want to do a little cleanup in the Tab Switcher, after closing irrelevant tabs, you can also remove them from the Closed Tabs list.
To clean up your Closed Tabs:
- Open the Tab Switcher.
- Go to the Closed Tabs page.
- Long-press on an entry.
- Select “Remove all”.
Tip #659
February 26, 2025
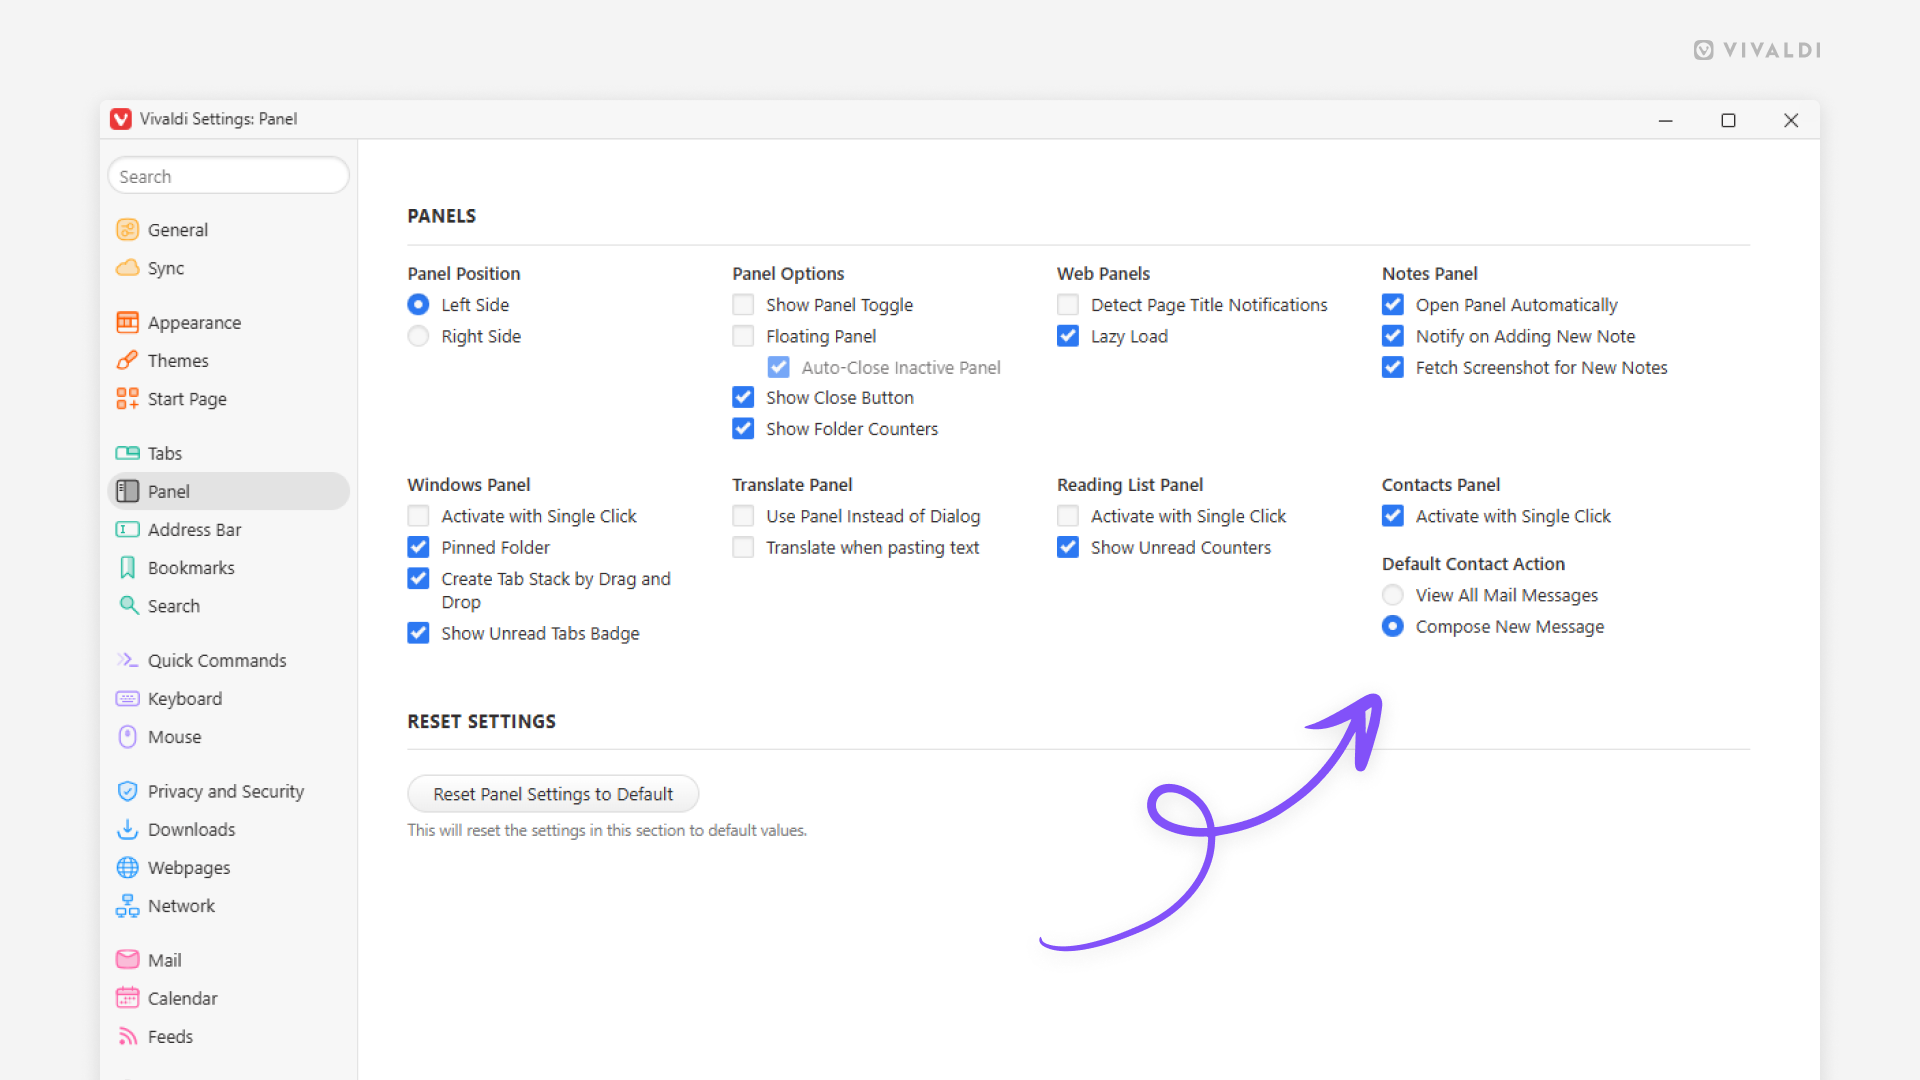
Start composing a new email with one click in the Contacts Panel.
By default, when you click on a contact in the Contacts Panel, it will open Vivaldi Mail with all mail correspondence between the two of you. If you’d rather start composing a new email message to them, there’s a quick setting change you need to do.
To change your preference:
- Go to Settings > Panel > Contacts Panel > Default Contact Action.
- Enable “Compose New Message” instead of “View All Mail Messages”.
In Contacts Panel settings you can also choose whether your preferred action should take place after a single or double-click. You can access the other option from the right-click context menu.
Tip #658
February 25, 2025
Open the Notes Panel automatically when creating a new note from text selection.
A good starting point for a new note is selecting a snippet of text on a web page and turning it into a note by right-clicking on the highlighted text and selecting “Copy to Note”. To edit and organize the new note further, you can make the Notes Panel open automatically to get to the note faster.
To make the Notes Panel open automatically:
- Go to Settings > Panel > Notes Panel.
- Enable “Open Panel Automatically”.
Tip #657
February 21, 2025
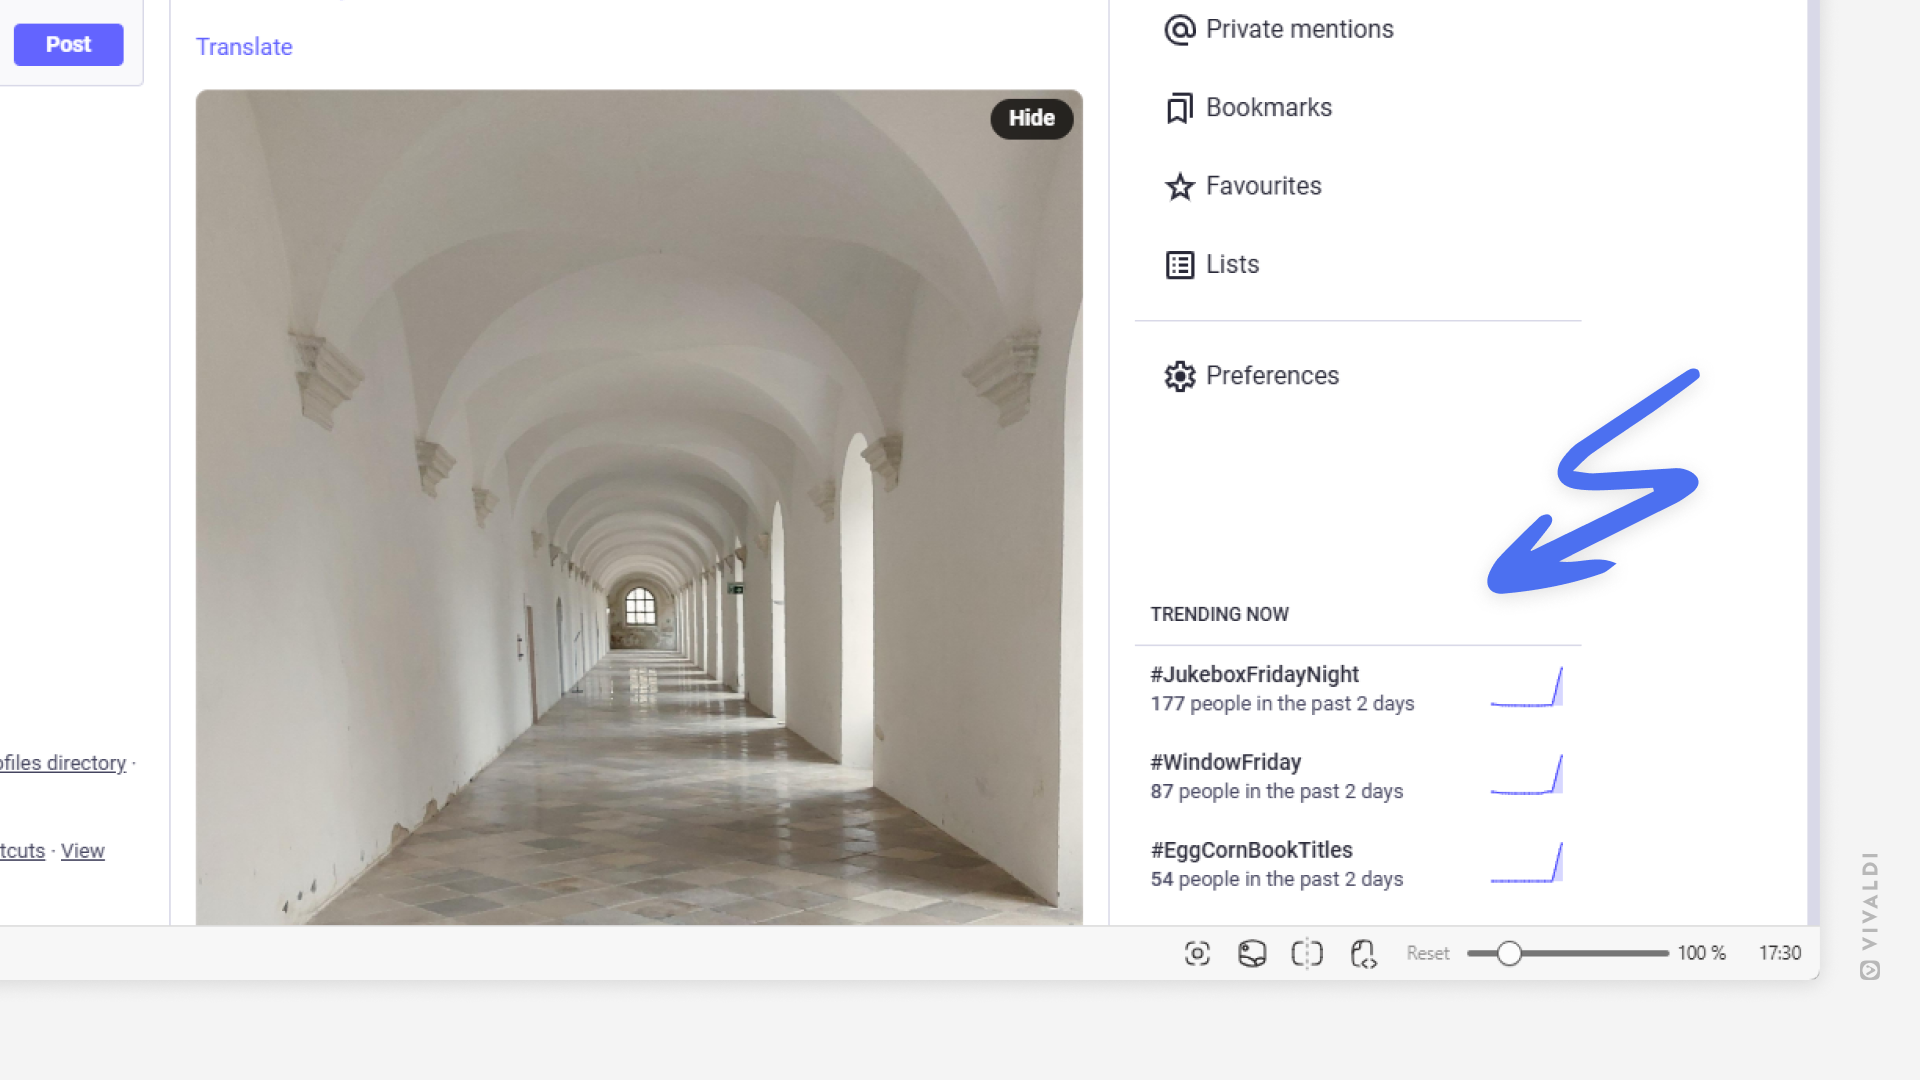
Check out top trends on Vivaldi Social with a quick glance at the corner of the page.
Mastodon has made it easy to see which hashtags are currently most used on Vivaldi Social. The top three are conveniently located at the corner of the page (exact location depends on your chosen theme). The full list, as well as trending posts and news, can be found on the Explore page. If you wish to keep your main Vivaldi Social view clean of trends, you do have the option to hide the section.
To hide currently trending topics from view:
- Go to Preferences > Appearance > Discovery.
- Disable “Show today’s trends”.
- Click “Save Changes”.
